 What says “summer” and “I have no class” better than a pair of cheap dollar store flip-flops? Now, with the help of Tacky Living, you can make your lack of taste even more obvious. What says “summer” and “I have no class” better than a pair of cheap dollar store flip-flops? Now, with the help of Tacky Living, you can make your lack of taste even more obvious.
Embellished flip-flops are fun, inexpensive, and easy to make. Whip up a pair to match your favorite outfit, complete a costume, or astonish your friends.
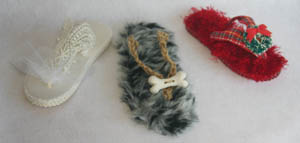
We’ll show you how to make radically different flip-flops – Caveman, Christmas, and Wedding – using the same basic techniques. After that, you can either use our ideas as a starting point or come up with your own.
You may find that decorating flip-flops is so much fun that you don’t want to stop at one pair. Flip-flop party, anyone? |
|
|
|
 |
|
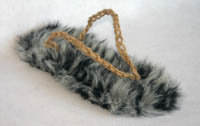
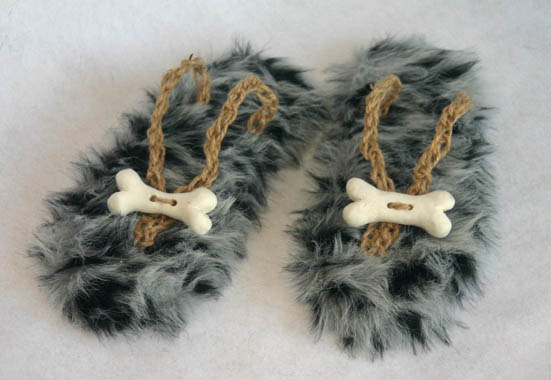
Project #1: Caveman Flip-Flops
Covered with fake fur and embellished with twine straps and polymer clay bones, these flip-flops are sure to be hot and uncomfortable to wear. However, they’ll look great with your loin cloth and you can be reasonably certain that no one else has a pair just like them. |
|
|
|
|
|
Supplies:
. One pair of flip-flops
. Glue (Hot melt glue is okay for short term useE6000 is fairly durable, but has noxious fumes and takes longer to dry.)
. Fake fur
. Polymer clay (we used Sculpy)
. Twine
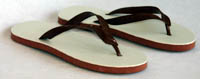
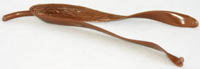
Very cheap, poor quality flip-flops like the ones shown at left will have the thong connection visible at the bottom, which makes them easy to modify. However, such flip-flops often have hard, thin soles which make them uncomfortable to wear. Hey – we never claimed that being stylish was comfortable! |
|
|
|
  |
|
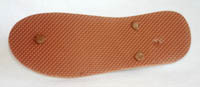
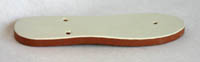
Cut off the strap, but save it
We’ll be using it in a later step.
Note the three holes through the sole of the shoe. These will also be used later when the new strap is attached.
|
|
|
|
 |
|
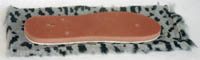
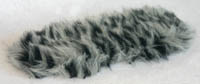
Glue fur to flip-flop
Cut out a piece of fake fur that is wide enough and long enough to cover the top of the shoe and its sides. You don’t have to worry about cutting the piece to shape; the fur will be trimmed to fit later.
Glue the fur to the sole of the flip-flop. |
|
|
|
 |
|
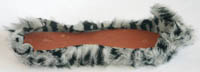
Decision time!
If you want your shoe to look like the one in the example, fold and glue the fur around the sides of the shoe. However, this will put the raw edge of the fur in direct contact with the ground, which means the shoe will be less durable.
If you want your shoe to be longer lasting, trim the fur flush with the sole, glue a decorative trim (rocks, rope) around the edges of the shoe, and skip down to the strap-making step. |
|
|
|
 |
|
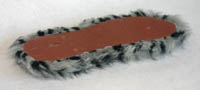
Trim the fur
After the glue has set up, trim the fur flush with the bottom of the shoe |
|
|
|
 |
|
Here’s what the flip-flop looks like when it’s turned right side up: a furry paramecium. |
|
|
|
 |
|
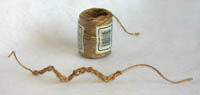
Make new straps
To give our straps a nice rough appearance, we made them out of common household twine. However, a single strand of twine looks too insubstantial to make a convincing strap.
To make a stronger-looking strap, crochet two twine chains that are each about as long as the old plastic strap. Leave two or three inches of uncrocheted twine at the ends
If you don’t know how to crochet, you can braid or knot several pieces of twine together to make two thicker, stronger-looking pieces. Feel free to improvise; that’s what the cavemen had to do. |
|
|
|
 |
|
Attach straps
Removing the original strap from your shoe revealed three holes. Using these as a guide, poke matching holes in the glued-on fake fur with a craft knife or sharp-pointed scissors. (Be careful!)
Working from the furry side of the shoe, feed the twine straps through the holes. Note that the hole around the toe area should have two strap ends threaded through it.
Carefully try on the shoe and adjust the length of the straps for comfort, pulling any excess out through the holes in the bottom of the shoe. To discourage the straps from coming loose, tie a series of knots in the sections of twine that go through the holes.
Trim the straps’ excess lengths to about two inches and glue the raw ends to the bottom of the shoes, making sure to get a good blob of glue around the knots and within the holes. |
|
|
|
|
|
Embellish shoes
To accentuate the classic caveman look shown at left, we made polymer clay bones. Before baking the bones in the oven, we pierced holes in each of them so that they could be tied to the twine straps.
But why stop there? Seashells or other natural objects would also work well with this theme.
See larger photo |
|
|
|
 |
|
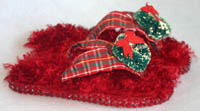
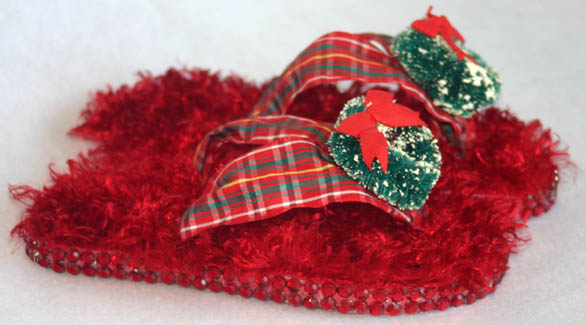
Project #2: “I Miss Christmas” Flip-Flops
These flip-flops are an example of how the same basic construction technique can be used to arrive at stunningly different results. To make these shoes, follow the instructions for the Caveman flip-flops except:
. Instead of wrapping the fake fur around the sides, trim it even with the sole.
. Glue red rhinestones around the sides of the shoes. (We used about 300 7 mm rhinestones.)
. Instead of twine, use red and green plaid ribbon for the straps.
. To embellish the straps, glue on small Christmas wreathes.
See larger photo |
|
|
|
 |
|
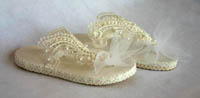
Project #3: Wedding Flip-Flops
This project also uses the same basic construction techniques as the Caveman flip-flops, except:
. Before attaching fabric, glue a layer of batting to the sole and trim it even with the shoe’s sides. This will give the finished flip-flop an elegant, somewhat padded appearance.
. Instead of using fake fur, use satin. Lay the satin over the batting, glue it down around the shoe’s sides, and trim the satin even with the bottom of the shoe. To make the satin lie flat around curved edges, it may be necessary to snip it – also known in sewing parlance as “clipping curves”. Take care to not snip into the fabric over the batting when you do this.
. Glue lace trim around the sides of the shoe, over the satin. This will cover any snips you had to make in the fabric
. A small, roughly triangular lace bodice inset is used in lieu of straps on each shoe. (We found ours in a bin at a Jessica McClintock factory outlet for the grand sum of twenty cents apiece.) To reinforce the lace and keep it from stretching, we sewed a length of ribbon along each side of the lace. Several inches of ribbon should be left extending beyond the lace, then fed through the holes in the shoe and glued down.
. “Pearls” are glued to the lace.
. A short length of tulle is gathered and sewn to the strap in the toe area to make a “toe veil”.
See larger photo |
|
")


