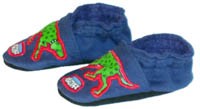
The current wisdom is that shoes with flexible soles are best for little ones, yet they come at premium prices.Although I don’t begrudge factory workers a decent salary, the cost of multiple pairs of such purchased shoes can be prohibitive. After a summer of watching my toddler wallow in the filthiest puddles he could find and never having a clean dry pair of shoes when they were needed, I knew I’d have to draft a shoe pattern.With this pattern and a few basic materials, you too can make slippers or shoes for your child. Even better, you can decorate them to suit. Perhaps your child has an unnatural fondness for gold lamé or thinks anthropomorphic strawberries are stylish? Or perhaps you’d like a pair of shoes that exactly matches a special outfit or costume? When you make your child’s shoes, you decide how they look.
You can even involve your child in the process by letting him or her choose the fabrics or decorate the shoes after they’re made. Even a preverbal child can participate in “choosing” fabrics by pointing at bolts of cloth.
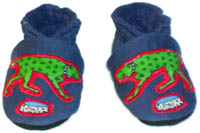
The shoes shown in this article were made from a denim apron found in the garage, lined with some fuzzy fabric that was hiding in a drawer, and soled with suede leather bought on sale at a crafts store. Total cost: $4 for leather, plus another $3 for a set of leather needles that will sew several more pairs of shoes. Your costs will vary, of course.
Some words of caution: these shoes are not waterproof, and will only be as warm as you make them. The thin leather of the soles will offer protection against some, but not all, objects your child might step on.
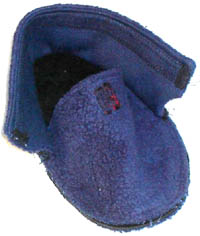
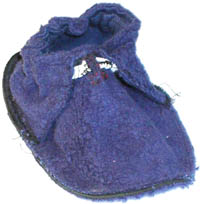
See examples of shoes made from this pattern in our first and second baby shoe galleries. Also see the baby shoe FAQs for additional information.
Basic supplies
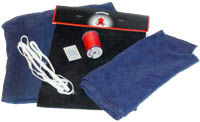
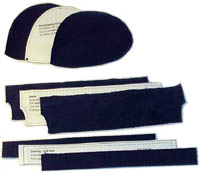
- The downloadable pattern (EPS, PDF, GIF)
- Exterior fabric, 1/4 yard – Moderately heavyweight fabrics like denim and canvas are fairly durable and work well. If your child isn’t intent on mud puddles and mayhem, you can experiment with fancier fabrics like velvet. Depending on the size of your child’s feet, you might only need as little as 1/8 yard of fabric, but buy 1/4 yard to be on the safe side.
- Lining fabric, 1/4 yard – Let the season of the year determine the weight of your lining fabric. Although a heavyweight fleece might be appropriate for winter, a lightweight fleece or flannel would be better for warmer seasons. As with the exterior fabric, 1/4 yard should provide enough material to line several pairs of these tiny shoes.
- Leather needles, size 14 – these are sewing machine needles with a wedge-shaped tip specifically for use in sewing leather.
- Standard sewing machine needles, size 14 or 18 – You’ll probably need to use size 14 or 18 needles for sewing the fairly heavyweight fabrics involved.
- Thread – purists will insist on using special thread to sew leather, but your child is going to outgrow the shoes long before they’re worn out. Use whatever is on sale or that you already have on hand.
- Leather – Many crafts stores sell pieces of suede about the size of a sheet of notebook paper. One of these will probably be enough for one pair of baby shoes.
Note: a reader, Michele Guilmet, has pointed out that it isn’t necessary to use leather soles if your baby isn’t walking. She soled her shoes with scraps of corduroy instead. - Elastic – 1/2 yard of 1/4″ wide.
- Wonder-Under, 1/4 yard or a package of tape – Wonder-Under, Heat-n-Bond, and similar products are fusible webbing with adhesive on both sides. One side exposes the adhesive, for initial placement on the project, and the other side is covered with removable paper. As with the other materials, 1/4 yard or a package of tape will provide enough to make several pairs of shoes.
![]()
Embellishment ideas:
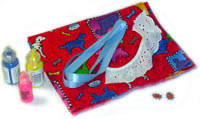
- Fabric paint – Painting shoes after they’re made is great fun for kids. Use fabric paint, or if you already have water-based acrylic paint on hand, try painting a sample of your exterior fabric with it and running it through a wash/dry cycle to see how durable it is.
- Sew on lace, ribbon, or appliqués while constructing the shoe. You can buy ready-made appliqués or make your own. I made mine by “fussy cutting” around dog motifs from a piece of fabric, then using the satin stitch on my sewing machine to cover the raw edges of the appliqués.
- Embroider or quilt the pieces of the shoe before sewing them together.
![]()
About Fitting: After downloading the pattern, you’ll need to scale it to fit your child’s feet. This can either be done right on your computer, if you have the appropriate software, or at a copying machine. Don’t be discouraged by all the text below – scaling the pattern takes some attention to detail, but it isn’t hard.
![]()
Scaling the pattern:
- Measure the length of your child’s foot from heel to toes. (This part can be challenging, since children tend to wiggle their toes furiously.)
- To that number, add 1/2″ for “wiggle room” and 1/4″ for seam allowances, for a total of an extra 3/4″.
Next, measure the length of the pattern piece for the sole, including the seam allowances.
The amount you’ll need to scale the pattern will be the length of your child’s foot + 3/4″, divided by the length of the sole pattern piece. To get a percentage for copying machines and software, multiply the scale number by 100.
![]()
Test fitting the pattern
Once you’ve scaled the pattern, make a printout of it and compare the pattern for the sole to your child’s foot. Allowing for a 1/8″ seam allowance all around, does it look like your child will have about 1/2″ of room at the end of his/her toes? If not, try scaling the pattern again.
If the pattern seems to be scaled correctly, you may wish to do a test fit using an inexpensive fabric like muslin stabilized with iron-on interfacing. Simply cut out and sew together one sole, one back, and one vamp, not worrying about lining them or prettying up raw edges. Try the test shoe on your child. Keep in mind that the test shoe won’t have elastic and muslin is much thinner than the fabric you’ve chosen, so the shoe will seem very loose and floppy. However, you’ll at least be able to tell if something is seriously wrong and you’ll get an idea of how the pattern pieces fit together. Another way to test fit the pattern pieces is to cut one set out of aluminum foil and wrap them around your child’s feet.
![]()
Some other things to keep in mind:
- Thick lining materials will use more room than thin ones, so you may want to scale the pattern a little bigger when using them.
- Is scaling the pattern getting you down? Don’t worry. Unless you need the shoes immediately, it’s better to make them a little too big than too small. If they end up much too big, you can put them aside for awhile until your child’s feet grow. In the meantime, you will have gotten valuable experience and you’ll know what to expect the next time you make shoes.
![]()
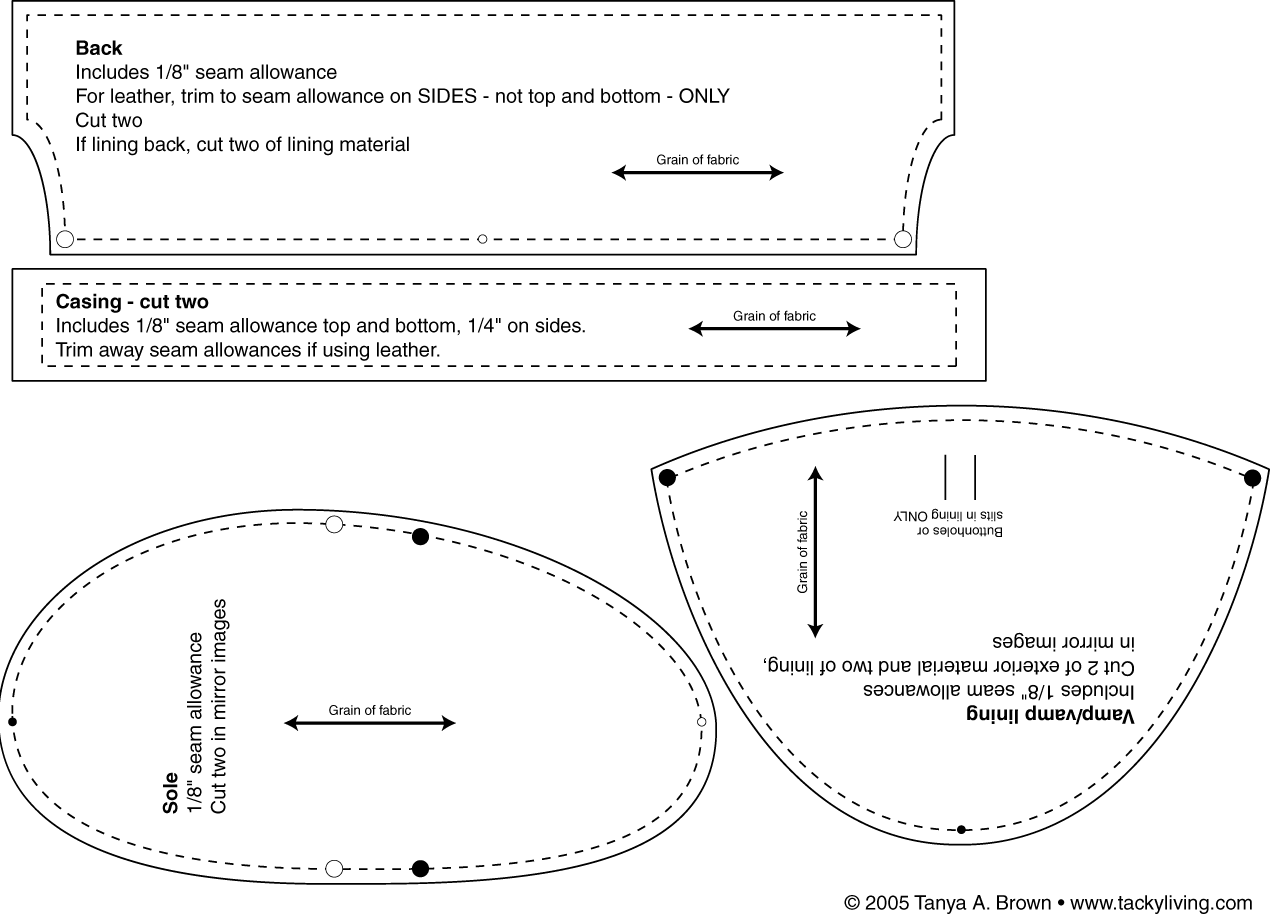
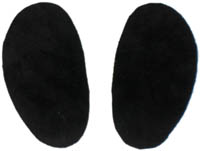 Leather pieces: Cut out two sole pieces in mirror images, as shown. Leather can be challenging to cut, so use good sharp scissors for best accuracy. Note: reader Michele Guilmet has pointed out that it isn’t necessary to use leather soles if your baby isn’t walking. She soled her shoes with scraps of corduroy instead.
![]()
 Exterior fabric pieces: Unless you’re using a fancy fabric like velvet, prewash and dry both the exterior and interior fabrics. This will allow the finished shoes to be cleaned in the washer without fear of shrinkage, colors bleeding, and so forth.Cut out two each of the vamp, casing, and back in mirror images.
Note: reader Michele Guilmet found that she could substitute packaged fleece bias tape for the casing, thus simplifying the somewhat tedious step of making the casing.
![]()
 Lining fabric pieces: Cut out two each of vamp and back in mirror images – wouldn’t it have been nice if I’d chosen a lining fabric which was a different color than the exterior fabric? Then it would be easier to tell what was happening in the photos that follow. Whoops.
![]()
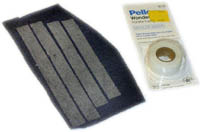 Attach sole lining to sole leather: This step helps keep the sole lining from slithering around separately from the sole, which is important for little ones who are new to walking.Cut a couple of pieces of lining fabric big enough to cover the leather soles. As you can see from the illustration at left, there’s no need to be tidy about this; excess material is going to get trimmed away at the end. Following the instructions on the package, attach double-sided fusible webbing, AKA Wonder-Under, to the wrong side of this fabric. (Since I had fusible tape on hand, that’s what I used. A sheet of fusible webbing would work equally well.)
The webbing should fill enough of the fabric to cover the leather sole.
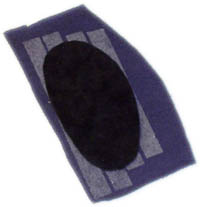 Following the instructions on the package, adhere the leather to the lining piece. Manufacturers instructions will vary, but when I did this, I had to:
- Peel the paper backing away from the fusible webbing.
- Place the leather sole on the fusible.
Important: you’re going to want to end up with two finished soles that are mirror images of each other, like a butterfly’s wings. If you get to the end and find that you’ve goofed, simply heat one of the soles, peel the untrimmed lining off the leather, and iron it to the other side. Some adhesive may show on the bottom of one of the finished shoes as a result, but your child will quickly disguise it with dirt.
- Place a sheet of paper on my ironing board to protect it. Otherwise, any excess fusible webbing would have stuck to it.
- Place the sole “sandwich” thus formed on the ironing board, leather side down.
- Crank up my iron to the highest setting safe for the lining fabric and the fusible web.
- Cover the sole “sandwich” with a damp cloth.
- Press aggressively until the leather is adhered to the lining fabric.
![]()
Once this is done, trim the lining fabric flush with the leather soles.
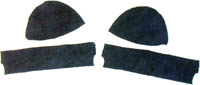
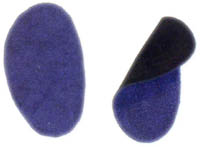 Here are the leather soles with the lining fabric adhered to them. Note that they’re mirror images of each other, just like butterfly wings or a child’s feet.
![]()
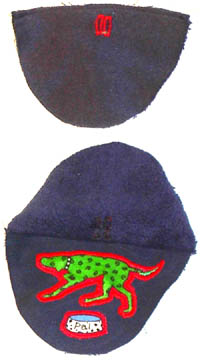
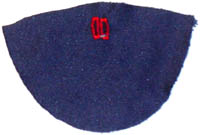 Sew buttonholes in vamp: It’s time to start sewing! Install a standard size 14 or 18 sewing machine needle and whatever thread you have on hand.Using your sewing machine, make button holes in each vamp lining. Approximate placement lines are shown on the pattern piece, but the buttonholes are on the inside of the shoe so they don’t have to look great or line up precisely. (Mine certainly don’t!)
![]()
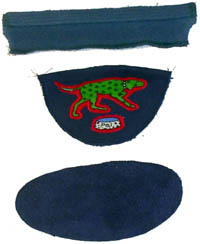
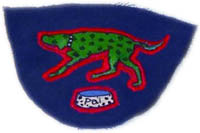 Decorate shoe pieces: If you want to do any decoration other than painting, this is a good time for it. The pieces which will be visible when the shoe is done are the vamp, back, and casing cut from the exterior fabric.Here I’ve sewn “fussy cut” motifs from a colorful piece of fabric to each vamp and satin-stitched over the raw edges.
![]()
 Sewing the vamp: With right sides together and using a 1/8″ seam, sew the top edge of each vamp lining piece to the top edge of a vamp exterior piece. (top picture)Turn vamp inside out and press along the seamline. (The lower photo shows the vamp when it’s spread open, to demonstrate how the pieces go together.)
![]()
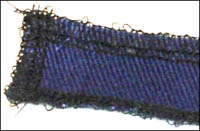 Edge finish casings: To prevent fraying, edge finish all four edges of each casing piece. Here I’ve used a serger, but you can also turn under a very narrow hem and sew it down.
![]()
![]() If you didn’t already do so when edge finishing, turn under the top and bottom edges of the casings and press them. The casing should be 1/2″ wide after pressing. If you’d like, you can topstitch the casing to further immobilize the raw edges.
If you didn’t already do so when edge finishing, turn under the top and bottom edges of the casings and press them. The casing should be 1/2″ wide after pressing. If you’d like, you can topstitch the casing to further immobilize the raw edges.![]()
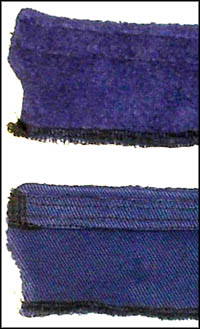
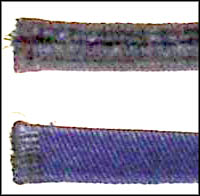 A terrible closeup of the turned-under edges from the inside (top photo) and outside (bottom photo).
![]()
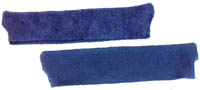 Sew the backs: With right sides together and using a 1/8″ seam, sew the sides and top of each exterior back to a lining back.Turn inside out, paying special attention to corners and curves. You may have to clip these troublesome areas to get them to turn inside out nicely press. If desired, top stitch around all edges. (In addition to being decorative, this will make the backs a little easier to handle when you sew the shoe together.)
![]()
 Sew casings to backs: Place edge of casing approximately 1/8″ away from the top edge of the back. Sew along the top and bottom edges of the casing in a narrow seam, leaving as much room as possible for the elastic.
In these photos, we’ve placed the casing on the outside of the shoe. However, reader Michelle Guilmet tried placing them on the inside, which led to a more polished appearance. Feel free to try it either way.
![]()
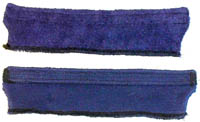
 Another terrible closeup, this time of the inside (top photo) and outside (bottom photo) of the back. Remind me not to make any more demonstration projects out of hard-to-photograph dark colors!Notice that I’ve serged along the bottom edge of the back. This is totally optional.
![]()
 Here are the pieces we’ve worked on thus far: back, vamp, and sole. It’s assembly time!
![]()
 Sew vamp to sole: Install a leather needle in your sewing machine.With the suede side of the sole facing the exterior side of the vamp, match the dark circles shown on the pattern pieces. Sew vamp to sole in a 1/8″ seam.Note: I tried to make all of the pieces other than the sole symmetrical, so if you get the left back sewn on the right sole, it shouldn’t be a tragedy.
![]()
 Sew back to sole: With the suede side of the sole facing the exterior side of the back, match the hollow circles shown on the pattern pieces. Sew back to sole in a 1/8″ seam. Note that the back will slightly overlap the vamp.
![]()
 Insert elastic through casing and buttonholes: Measure your child’s ankle and cut a piece of elastic this length.Thread the elastic through the casing with an elastic inserter, or attach a safety pin to one end of the elastic and push the pin through the casing by feel. This task is annoying but doable, particularly if you dull your brain with music or TV as you work. Be careful not to let the other end of the elastic disappear into the casing! One way to avoid this is to safety pin the elastic’s free end to the shoe while you work.
Thread the elastic through the buttonholes, as shown in the photo at left.
Once the elastic is threaded through the casing and buttonholes, overlap its ends by about an inch, safety pin the ends together, and test fit the shoe on your child. The elastic should be snug enough to hold the shoe on and discourage its removal, but not uncomfortably tight.
Once the elastic is adjusted as desired, sew the ends together (but not to the shoe).
![]()
 Turn shoes inside out. You’re done!
Unless the shoes are made from a special fabric like velvet, they can laundered in the washer and dryer.![]()
See examples of other shoes made from this pattern in our baby shoe gallery.
![]()
If you’re into scrapbooks for babies, check out Baby Scrapbook Ideas.
")


[…] Here is another amazing pair of shoes with a dog print on it that makes it look really a professional pair and you can make it exactly the same with some pieces of fabric and basic stitching tools and the rest of the details are right here tackyliving […]
Which ages is this pattern size used for?
I would say 6 months to about 3 years.
[…] for Roman at the moment as I made them to fit when he grows out of the slippers he has now. I used this tutorial and pattern to make them. (link is no longer […]
[…] next pair is from this pattern, though I shortened it a little […]
I just made these and they are so cute! Thanks for the great pattern!
Thanks Lizzie for taking time to put your reply with your photo. Have a great day!
[…] Tacky Baby Shoes (shown below) […]