| You’ve seen similar ceramic or dried “ristras” of peppers in upscale markets and boutiques. Our fool-the-eye version will cost you very little, particularly if you have excess sanitary supplies due to pregnancy or menopause. |
 |
|
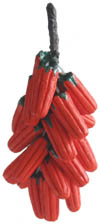
We first saw these “peppers” hanging in the kitchen of Laura Mappin, a mixed-media artist whose works often have a humorous or irreverent bent. We walked by them many times before realizing that they were, in fact, made of tampons.Laura’s peppers, shown at left, are thicker and more voluptuous than the ones we’ve made in this projectPeppers come in many shapes, sizes, and colors. Feel free to try different approaches, depending on the materials you have on hand and of course your personal taste.
By their very nature, tampons absorb water based substances very well and expand in the process. If you want thicker peppers, simply paint the tampons with water based acrylic paintHowever, if you want slim peppers, you’ll need to either spray paint them or, if using water based acrylic paint, first seal them with spray-on clear coat.
|
|
|
|
 |
|
Supplies:
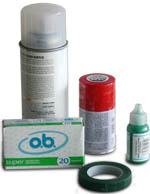
. One or more boxes OB or similar applicator-free tampons.
. Red, green, or yellow paint for the “peppers”. We’ve used spray paint to reduce swelling of the tampons.
. Green paint for “leaves”. We’ve used fabric paint to give the “leaves” some dimension.
. Acrylic clear coat, if one wishes to seal the tampons against swelling.
. Brown or green florist’s tape (available at craft stores)
. Newspaper or other substance to protect your work surface
. Wire coat hanger
. Pliers or calloused fingers |
|
|
|
 |
|
Make holder and seal tampons
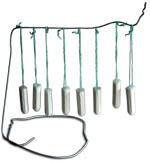
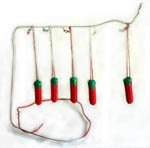
Using pliers or calloused fingers, bend the wire coat hanger into the elegant drying rack shown at left.If desired, seal the tampons by spraying them with clear coat or other spray paint. This will help prevent them from expanding. |
|
|
|
 |
|
Paint the “peppers”
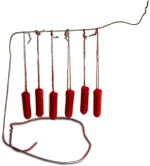
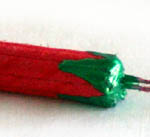
Paint the tampons in the color of your choice with spray or another type of paint. Don’t worry about getting paint on the strings. |
|
|
|
 |
|
Be sure to paint the tips of the tampons, since they will show when the project is complete. |
|
|
|
 |
|
Paint the “leaves”
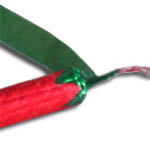
With green paint, cover the cap of the “pepper” and create leaves which drape down. Let the “pepper” dry thoroughly. The drying rack is especially handy in this step.
|
|
|
|
 |
|
Let the leaves dry thoroughly. If the paint is especially thick, it may take twenty four hours or more to dry. |
|
|
|
 |
|
Creating the ristraOnce you’ve created enough “peppers” – our example uses twenty – it’s time to join the strands together.
To do this, tear off a length of florist’s tape and wrap it snugly around the string of one of the tampons several times. |
|
|
|
 |
|
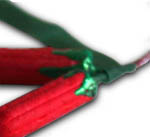
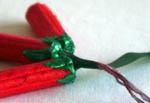
Next, overlap another tampon with the first and wrap the florist’s tape around both strings. |
|
|
|
 |
|
Continue adding on tampons and wrapping the florist’s tape snugly around their strings. When a piece of florist’s tape is used up, simply tear off another length, wrap it snugly around the existing tampon strings several times, and continue adding tampons. |
|
|
|
 |
|
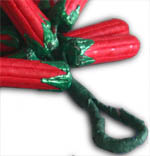
When you have added all of your tampons to the strand, they may look something like the photo to the left. Wrap all of the exposed tampon strings with florist’s tape, forming one bundle. |
|
|
|
 |
|
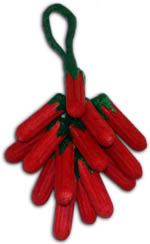
Bend the end of the tampon string bundle back on itself to form a loop. Secure the loop and hide any exposed strings by wrapping with florist’s tape. |
|
|
|
 |
|
You’re done!
Project variations:
. Try different paint colors
. Wire the “peppers” to a grapevine or wire wreath. Very cheery for the holidays, not to mention disconcerting!
|
If you enjoyed this project, you might also enjoy 101 Super Uses for Tampon Applicators. Although it doesn’t seem to be serious about the use of applicators as a craft item, it’s a light, diverting novelty book which may give you ideas for projects of your own.
The book’s clever graphic design includes a cover which mimics a tampon box and a string bookmark reminiscent of the strings found on tampons. Inside illustrations are rendered as rough sketches which are nevertheless high on concept.
|


