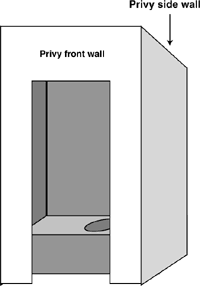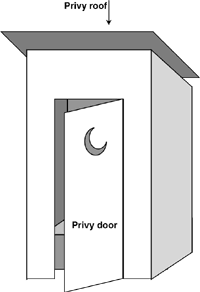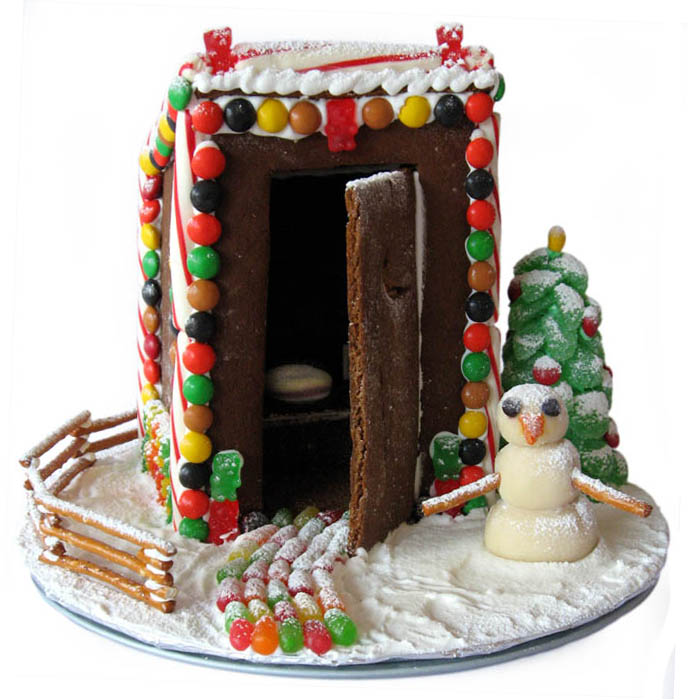
With just a little extra effort you can make something truly special, a heart-warming rural scene awaiting passing gingerbread people who need to “go.” Although construction of the house takes about a week, allowing for pieces to set up and dry, it’s straightforward to do.
As a bonus, unlike a real-life outhouse, this project will lend your home a sweet, spicy smell and will be delicious to eat for several weeks after construction.
- Design and resources
- General supplies
- Candy/decorations
- Recipes
- Prepare pattern
- Prepare gingerbread
- Make props (Snowman, tree, toilet paper)
- Construction
- Decorating and finishing
Design and resources: Our design is a 1/12th scale building based on the 1939 U.S. Forest Service “One Hole Leaching Pit Privy” plan found in The Vanishing American Outhouse by Ronald S. Barlow. While our version lacks some of the niceties, like a vent stack for noxious gases and a pit of soil, its one-piece, sloped roof makes it fairly simple to build.
Should you wish to explore different outhouse designs or simply enjoy the collection of photos, history, and anecdotes Mr. Barlow has assembled, his book is well worth a look. (The pictures of the two-story privies are especially mirth-inducing.)
For the nuts and bolts of gingerbread construction, we turned to Festive Gingerbreads by Evelyn Howe Fryatt. This book is abrim with recipes, decorating ideas, and house plans that are little different than the norm. Photos in this book inspired our gumdrop trees and pretzel stick fence.
Another valuable resource, this one online, is Gingerbreadlane.com. This site is generous with details about construction and preservation and also includes a variety of recipes and many useful tips.
Supplies: As you go through the supply list and instructions, bear in mind that they’re just a starting place. If you’ve always fantasized about a peppermint-encrusted outhouse or jelly bean crapper, go for it. Our choice of candies was mostly determined by what the grocery store had in the bulk bins.
| General supplies | ||
Making pattern pieces:
Rolling out the dough:
Baking and trimming:
|
Construction:
|
|
| Candy/decorations | ||
Gingerbread house
Path:
|
Tree:
Snowman:
Fence:
|
| Recipes | ||
| Gingerbread: You’ll want your primary building material to be stale and a little dry, great for construction use but not necessarily what you might be looking for in a cookie. There are some recipes you can use, one of which we’ve included at right. Others can be found on RecipeSource.com and GingerbreadLane.com.
Icing: Icing for gingerbread construction should be viewed as a construction material rather than a tasty confection. A good icing should dry fast and hard, which means that you’ll need to keep the bowl of icing covered with a damp cloth at all times when you’re working with it. We highly recommend using meringue powder rather than freshly beaten egg whites. Although egg whites are less expensive, an icing made with them must be used immediately. Construction and decoration of the outhouse take place over several sessions, which means that you’d have to make a fresh batch each time. By contrast, the meringue powder-based recipe at right can be stored at room temperature in a glass jar for up to two weeks. Meringue powder can be found on the cake decorating aisle of craft stores and some big box retailers such as WalMart. If you’d prefer to use an egg white based frosting, alternative recipes can be found on RecipeSource.com. Prepare pattern: Download and print out the pattern. (Part 1, Part 2, Part 3) Using a glue stick, adhere the pattern to cardboard. Cut out the pattern along the pattern lines. A craft knife (X-Acto) and metal straight edge are very helpful for this step. Tip: It isn’t necessary to cut the toilet seat hole or crescent moon in the patterns. These can be free-handed when you cut out the gingerbread. Do a “reality check” by holding the pieces together to ensure that they’re going to fit together correctly. |
|
Prepare gingerbread: Cover a pastry board with parchment paper and tape the paper down. Tape a length of 3/16″ wood dowel on each side of the pastry board. The dowels should be close enough together to rest the rolling pin on, plus about half an inch on either side of wiggle room.
Prepare one batch of gingerbread. Roll the dough out between the dowels, a little at a time. Dust the back of the pattern pieces with flour and lay on the dough. Cut the dough with a paring knife
or pizza cutter. Leftover dough can go back in the mixing bowl and be reused.
Tips:
- If you’re going to use a peach slice or other candy for the toilet seat, you don’t have to cut a hole in the privy seat since it won’t show.
- Traditionally a ladies’ outhouse was identified by a crescent moon window while men’s outhouse was identified by a star. If your outhouse is going to be for male use, you can carve a five-pointed star in the door rather than a crescent moon.
- Roll out a little extra scrap material and bake for crumbs to form dirt on the privy floor.
- If you want the path made of gingerbread, roll out a layer of gingerbread dough. Trim to about 2″ wide, making it gently curved if desired. With a paring knife, carve into cobble shapes. Bake.
 The Outhouse Gingerbread dough is finicky and will lose its shape if moved much! After you finish cutting out a group of patterns, untape the dowels and parchment paper and carefully slide the entire piece of parchment paper onto the cookie sheet. Cover the pastry board with a fresh piece of parchment paper and replace the dowels before starting the next batch of pieces.
Bake each group of pieces at 350 degrees for about 15 minutes.
Despite having very little leavening, the dough tends to sprawl out a bit during cooking. To ensure that your pieces will fit together accurately, after the gingerbread has cooled some but is still warm, place each pattern piece on top and trim around it with a pizza cutter or sharp knife. Place gingerbread pieces on the wire rack and allow to dry out for two or three days.
Construct props: While the gingerbread pieces are drying out, you can make some of the decorations.
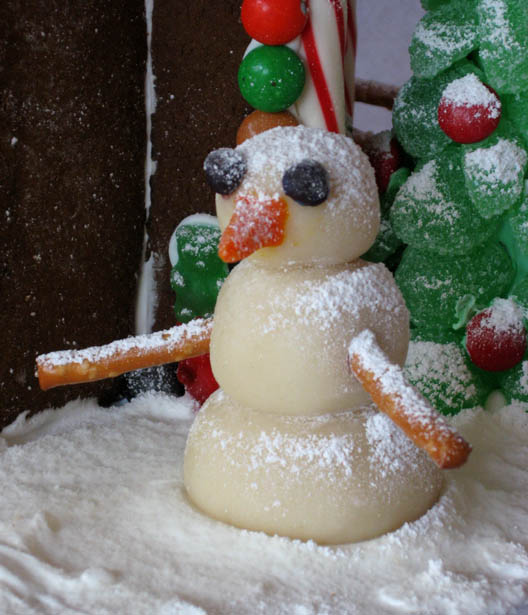
Snowman: Roll three balls of marzipan, ranging in size from about an inch to an inch-and-a-half. These will be your snowman’s body; set them aside for now.
Take a small amount of marzipan – about a half inch ball – and tint it a deep purple to simulate black. Separate the ball into two “coal eyes.” Set these aside to dry for a bit. (Since liquid food coloring isn’t as intense as paste color, it will leave the marzipan mixture a bit damp.)
Tint a smaller amount of marzipan orange to make the “carrot nose.” Set the marzipan aside to dry for a bit before shaping a cone-shaped nose from it.
We’re going to use toothpicks to strengthen the snowman. Line a small plate with parchment paper or wax paper, and place your largest, 1 1/2″ diameter ball of marzipan on it. Jab two or three toothpicks through the top of the ball. Stack the next smallest ball on top, impaling it on the toothpicks. Add more toothpicks to the top of that ball, then place the smallest ball on top. (Remember, if you’re not quite happy with the way your snowman looks at this stage, it’s simple enough to peel the marzipan off the toothpicks, roll new balls, and try again.)
Carefully smush the eyes and nose onto the face. Jab small pretzel sticks into the sides of the middle ball to form arms. Set the snowman aside in a safe place.
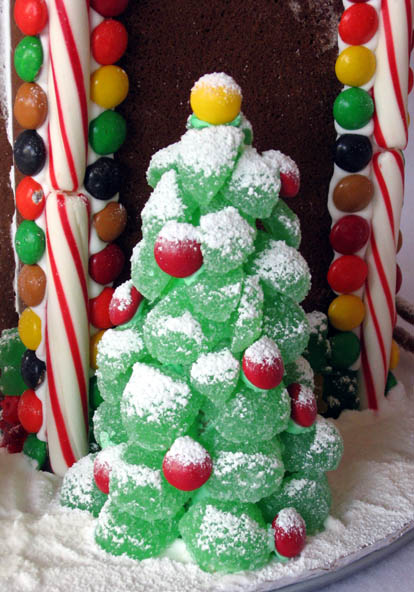 Tree: Prepare one batch of icing. Remember, this icing dries out extremely quickly, so keep the bowl of it covered with a wet towel at all times.
Line a small plate with parchment paper or waxed paper and set an ice cream cone upside down on it.
Prepare green gumdrop “leaves” by cutting gumdrops in halves or quarters lengthwise, then slightly scooping out the flattened end.
In a small bowl, mix a small amount of frosting (about 1/4 – 1/3 cup) with blue and yellow food coloring to make a green base coat. This is going to be your “glue.”
Starting at the bottom of the ice cream cone, apply frosting about an inch up the cone.
Press on a gumdrop bits rounded edges down. Make a layer all the way around the cone, then add more layers, adding additional frosting as you work your way up to the tip of the cone.
Let dry.
Use either plain or tinted icing to glue candies to the tree for decorations. Tip: a cotton swab works pretty well for daubing icing on small candies.
Set the tree aside in a safe place.
Toilet paper: Warm and soften one stick of gum by carrying it in your pocket for awhile or, if you’re female, by placing it in your brassiere.
Once the gum is softened, unwrap it and roll it up to make the toilet paper. A small bamboo skewer or round toothpick is useful to start the rolling.
| Construct outhouse | ||
| After the gingerbread has dried out for two or three days, you may begin construction.
GingerbreadLane.com recommends doing a test fit of the gingerbread pieces first, using a rasp (from a hardware store) to true up pieces if necessary. Since the pieces have already been trimmed to the patterns after baking, hopefully rasping won’t be required. Gather supplies and make icing: Gather up your construction supplies – a few cans of soda or food to rest pieces against, a construction square to check angles, a If you haven’t already done so, prepare a batch of icing. If you have a pastry bag, fit it with a round tip that has a 1/8″ diameter hole (#6 tip), and spoon in about 1/3 cup of icing. Otherwise, cut 1/8″ off the end of a zip lock plastic bag, spoon in about 1/3 cup of icing, squeeze out excess air, and seal it. Erect side, back, and bench: Decide where you want the outhouse to sit on the board. Using your cardboard pieces, trace a rough outline on the board. For each set of pieces, we’ll ice the edges that meet and pipe icing on the outline of the foil to glue them down. Using a spatula or butter knife spread a moderate amount of icing onto one side of a privy bench vertical support. Align the support with the bottom edges of the privy back wall and press it on. Let it sit for a few minutes to dry. Using your pastry bag or impromptu zip lock bag substitute, pipe a moderate amount of icing on the foil where the privy back wall and one of the privy side walls will stand. Ice the edge of the back wall that will meet the side, then stand the back wall on its icing line. Set the side on its icing line and mate it to the back wall. Check the angles of the walls with respect to the board and each other with a construction square. Prop the walls in place with cans of soda, if desired. Allow them to dry for a few minutes. While you’re waiting for those two walls to dry, if you’re going to cover the hole in the privy seat piece with a candy toilet seat, glue the candy on that piece with a small amount of icing. Pipe a line of icing on the foil where the second privy bench vertical support will need to stand. Ice the edge of the seat support that will touch the existing side wall, and stand the seat support on its icing line. Let it dry briefly. Ice the bottom edges of the privy seat that will rest on the two vertical supports. Press it in place and allow it to dry briefly. Daub a small amount of icing on the chewing gum toilet paper roll and press it into place on the privy seat piece. Tip: We prefer clean restrooms, so we chose not to go this direction, but an additional authentic touch can be added with a judicious application of chocolate cake sprinkles, melted chocolate, or chopped raisins. We’ll leave it to your imagination what those might simulate. Finish walls, add door and roof: Pipe a line of icing on the foil where the second privy side wall will stand. Ice the edge of the back wall and the privy bench that will be in contact with the side. Stand the side wall in place and check its alignment with a construction square. Allow it to dry for a few minutes. Spread a thin layer of icing on the floor area in front of the privy bench. Sprinkle with gingerbread crumbs for “dirt.” Pipe a line of icing on the foil where the front wall of the privy will stand, leaving an opening for the door. Also, ice the front edges of the side walls where they will be in contact with the front wall. Press the front wall into place and allow it to dry for a few minutes. |
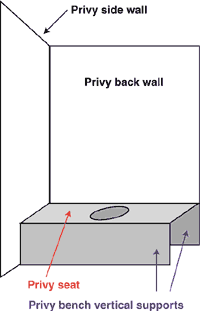
|
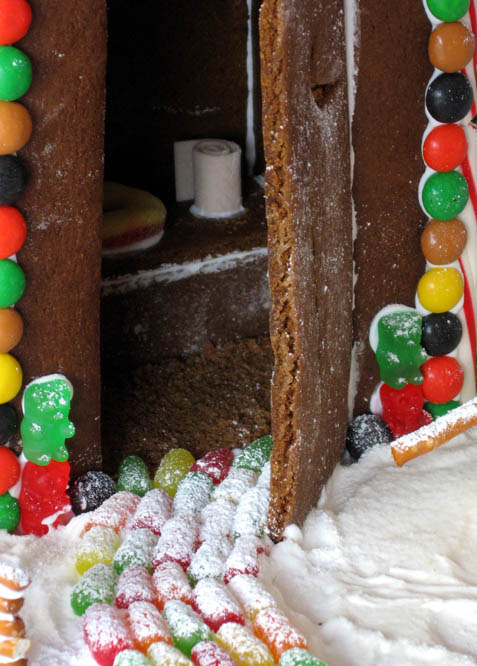 Apply additional frosting and cookie crumb dirt to any privy floor areas that are still visible.
Ice the bottom and back edges of the privy door and press it into place, slightly ajar so the inside of the privy can be seen. Allow it to dry.
Pipe icing along the top edges of all of the walls. Press the roof into place.
Allow all of the icings to set up for a day before applying decorations.
Decorating and finishing: To decorate the outhouse, pipe or spread on icing and press on candies as wished. If desired, additional decorative touches can be added by using specialty tips on the icing bag to add swirls, zigzags, stars, or icicles.
Make path: Spread a path of icing on the foil from the outhouse door out to the edge of the cake circle. Press on candy “cobbles” or pieces of cookie or graham cracker to form a path.
Add Tree: Spread a layer of icing on the foil from the outhouse to the area you want the tree. Place the tree on the damp frosting.
Add snowman: Spread a layer of icing on the foil from the outhouse to the area you want the snowman. Press the snowman into the damp frosting.
Construct fence: Spread frosting over any uncovered areas of the board. Press a layer of pretzel sticks into the damp frosting, spacing them, so they’re a little the closer together than the length of one stick.
Ti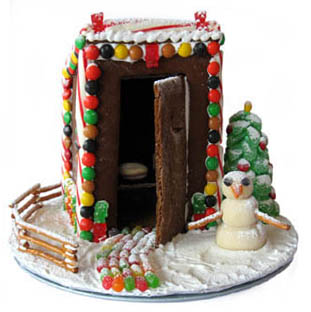 p: the fence will be most stable if it isn’t formed in a straight line.
Let the frosting dry a bit. Using a cotton swab to apply icing to the ends, add a second layer of pretzel sticks to the top. Use small broken bits of stick to ends for vertical spacers.
Add a third and fourth layer as desired.
Snow: Sift confectioner’s sugar over the entire scene. For maximum control, place a small spoonful of sugar in a small strainer, then tap the strainer as you hold it over the scene. Repeat as desired.
You’re done!

